When working on a patch for Nextcloud’s Android app, my builds suddenly started failing after I had pulled the latest upstream changes.
When building, the task :app:dexBuilderGenericDebug , which is part of the standard build process, failed with dozens of “File name too long” errors like:
java.nio.file.FileSystemException: /home/myuser/devrepo/nextcloud-android/app/build/intermediates/global_synthetics_project/genericDebug/dexBuilderGenericDebug/out/com/owncloud/android/ui/adapter/ReceiveExternalFilesAdapter$ReceiveExternalViewHolder$$InternalSyntheticLambda$2$6636dd2b6ebd75843672790eb9fec557e7c7714a7c99b5385b15a5972ca7d9f8$0.globals: File name too long
Using git-bisect, I was able to quickly identify the problematic commit. As part of an upgrade to Gradle 9, the Android Gradle Plugin was also updated:
The problem seems to be that the Android Gradle Plugin generates synthetic lambda class names that can exceed Linux’s file name length limit. Typically, a file name can be 255 characters (and full path 4096), but this is different if you layer eCryptFS with filename encryption on top of these file systems (as installed in Ubuntu with an encrypted home directory).
Then, the max filename is only 143 characters (source), which many of the lambda class names exceed (the one from the example above is 156 characters long)
I did verify this, and the console command confirmed this:
$ getconf NAME_MAX /home/myuser/
143
This seems to be a bug in the 9.0.0 release, so until it is fixed, the options are:
Create an unencrypted partition and build your app from there
Downgrade the plugin to 8.13.2 again
I would also assume that minifying the code could also help – but that’s not an option for debug builds.
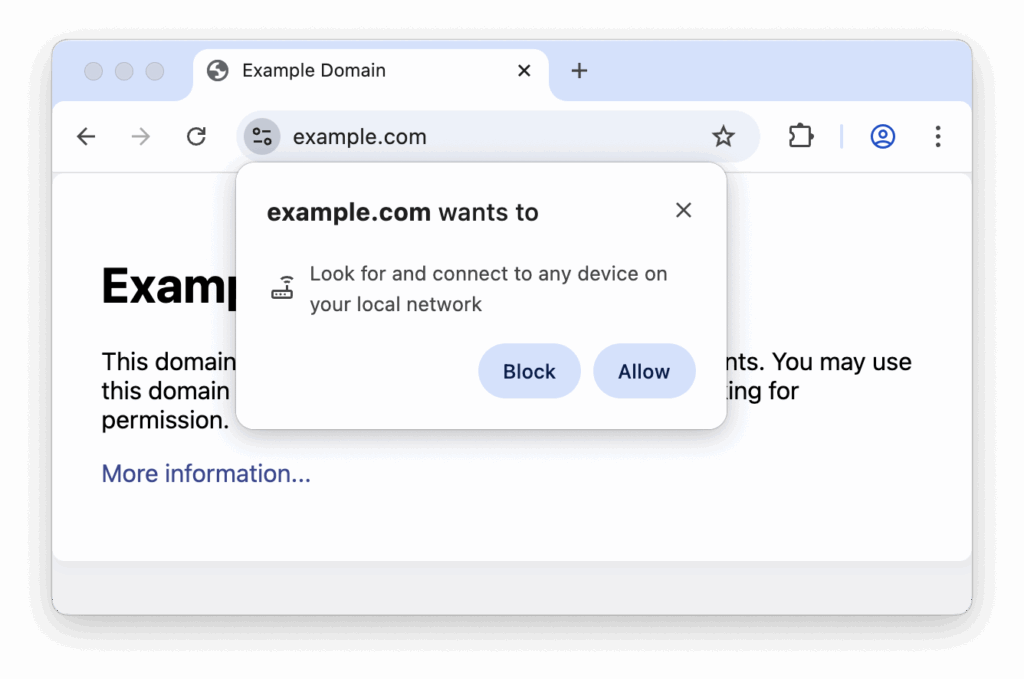
While technically a good feature, this caused me the better half of the day hunting a production bug in our SaaS product, which after all did not exist.
Turns out that Chrome will display the permission dialog also for requests which your company’s IT-mandated Endpoint Protection solution is grabbing for inspection. In our case, it was Zscaler causing issues.
If you deny the request (which from an end user perspective is the only reasonable choice), your web application will act weird.
Lucky me, our devices had just upgraded to Chrome 142 at the very same day we rolled out a production release. That’s how all hell broke loose.
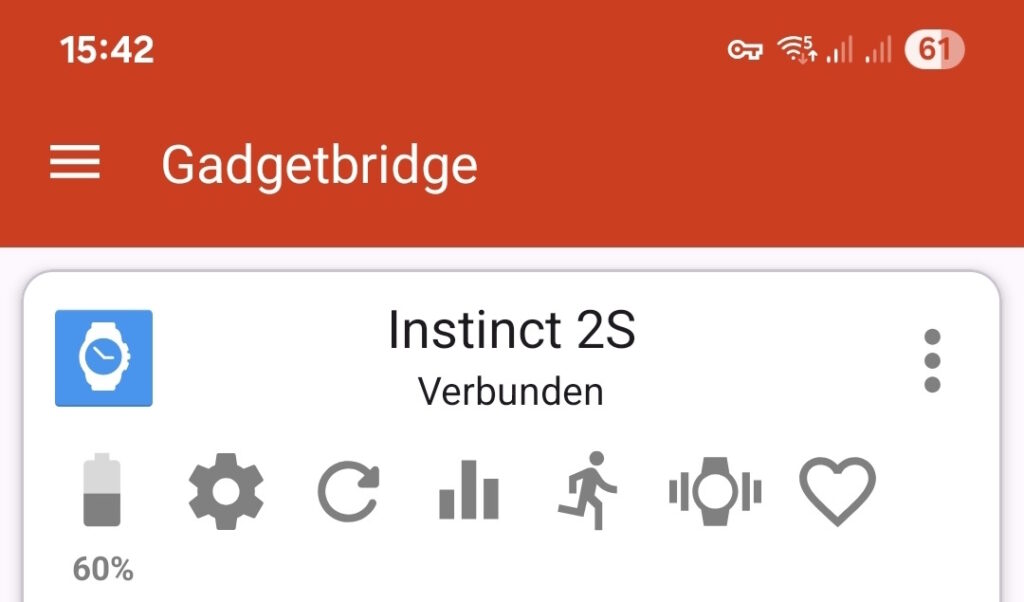
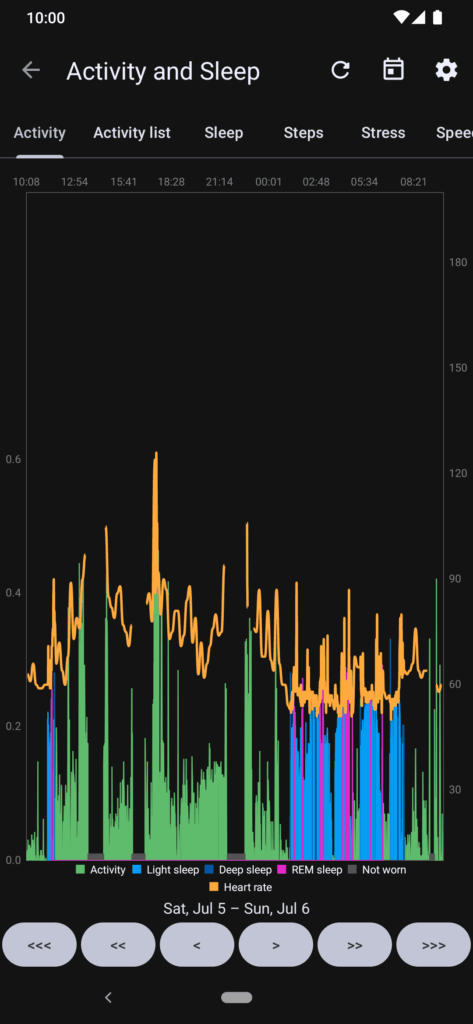
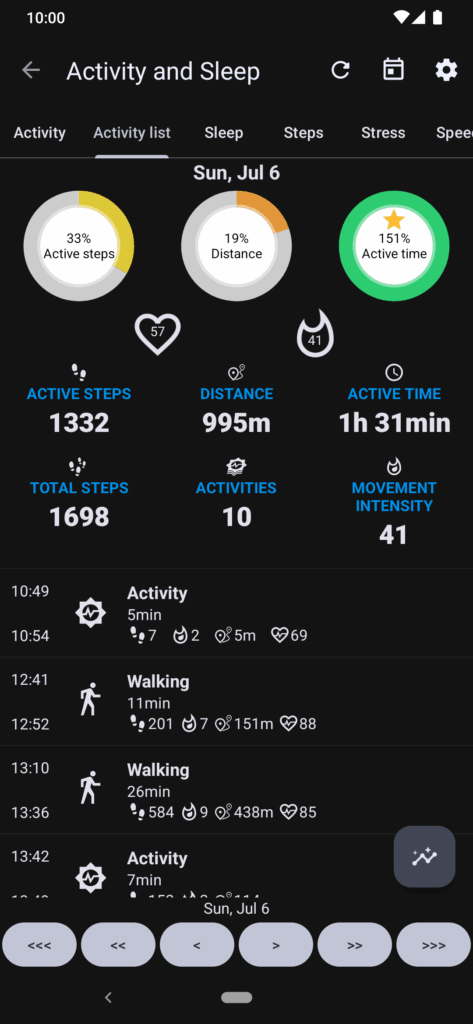
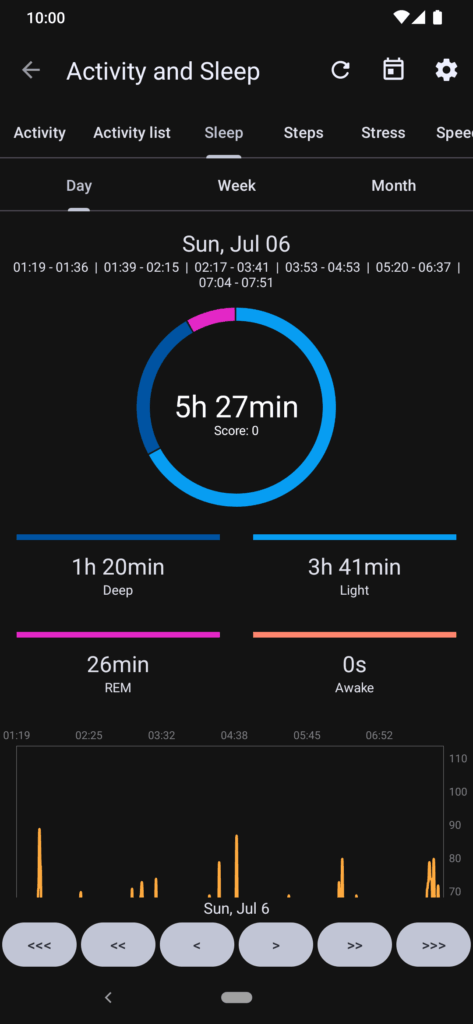
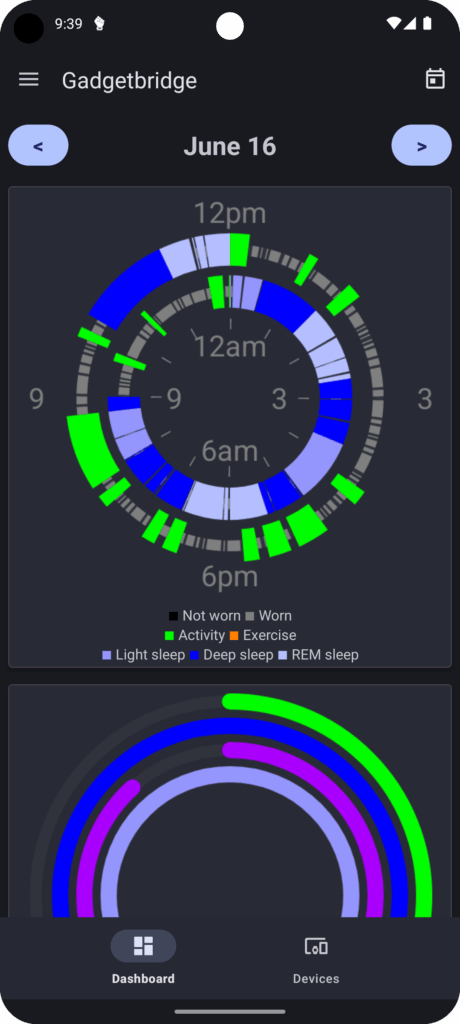
Honestly, the watch works well enough on its own. You need to get used to its 90s-Casio-watch-style control using five hardware buttons, but once you learned it, you could access all the relevant data without any additional connection.
But still, for a bit more convenience and more in-depth details of fitness and activity data, Gadgetbridge is quite nice. Inside the app, you can easily connect to the Garmin watch via Bluetooth.
Fetching and updating activity data is by default done manually via button press, since it may take 10-15 seconds. Once the data is downloaded from the watch, you can dive into all the details about your activities, sleep, heart rate, etc…
Screenshots from https://gadgetbridge.org/basics/features/activities/
There is a couple of maintenance steps you’ll need perform manually from time to time, as Gadgetbridge cannot interfere too much with the IP of the original manufacturers.
Firmware updates
Gadgetbridge allows you to upload updated firmware to the device, but it doesn’t tell you where to get these files from, most likely out of fear of retaliation.
So how do you get the firmware files for your Garmin watch? From a non-shady source, preferably? Easy: You can find them on Garmin’s official forum. More specifically: Their beta builds published for Side Loading contain the last official build as well, for an easy roll-back.
Inside, you find the latest official build under SystemBackdate_XX.XX/GUPDATE.GCD
Open Gadgetbridge, connect to your watch
Click the three dot menu next to your watch, then “File Installer”
Select the .gcd file and upload it to the watch
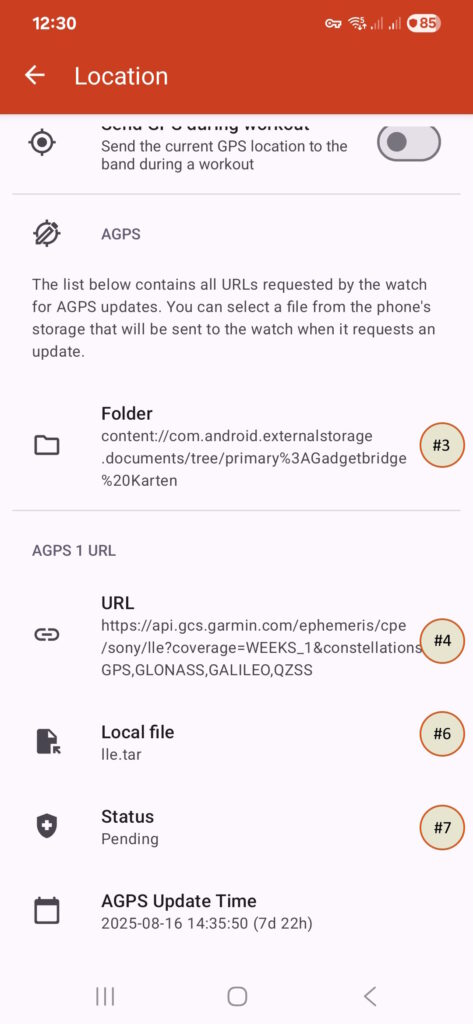
AGPS updates
AGPS is responsible for speeding up your GPS-based localization and make it more precise. For that, it relies on (pre-)computed satellite orbit and correction data. This must be refreshed from time to time, e.g. every 30 days.
Open Gadgetbridge, connect to your watch
Click on the gear to open the device-specific settings
Click on “Location” and scroll down where it says “Folder”. Set a folder where you will download the AGPS file in a minute.
After folder selection, back on the “Location” screen, see the AGPS 1 URL. Something like https://api.gcs.garmin.com/...
Click on it to copy it to the clipboard. Open the link in a webbrowser to download the file to the folder you set before.
Back on the “Location” screen, directly under the URL, select the “Local file” you’ve just downloaded
The “Status” should switch to “Pending”. Whenever the watch requests an AGPS update, Gadgetbridge will now intercept that call and deliver the file. You’ll see that some days later, the Status will then show “Current”
(Cloud) Backup
The automatic export periodically stores the Gadgetbridge database at a location of your choice, which can also be an online folder, e.g. from Nextcloud if you have the app installed. The important caveat is: This only stores the already processed data from Gadgetbridge, not the raw files from the device (e.g. .fit files in case of Garmin):
In the app’s settings (not the device settings!) go to “Automations”
Toggle the switch for “Auto export enabled” to ON
Under “Export location” select the folder where to export the Gadgetbridge.db to.
If you want to also get the raw files from the device backed up, this needs to be triggered manually:
In the app, open the tab “Data management”
Click “Export zip” and store the file at a location of your choice
The resulting file contains the Gadgetbridge database under database/Gadgetbridge and the raw device files under files/<device ID>/
More about backups, including examples of how to process the data in the Gadgetbridge manual.
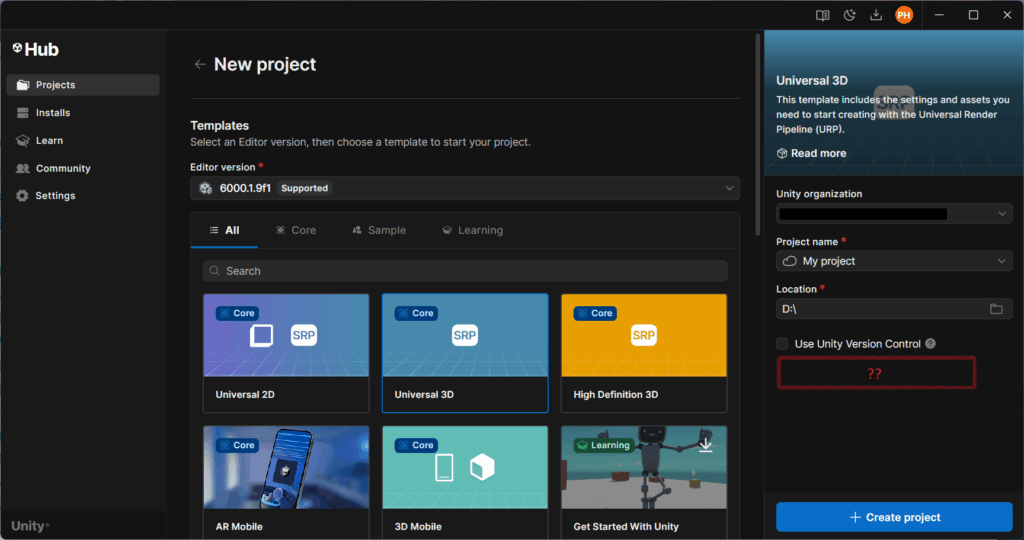
With their recent Unity Hub 3.13.0 upgrade, they have removed the option for not connecting a project to the Unity Cloud. Because all that yummy data, I guess…
This is how to setup a project without uploading everything to Unity’s servers:
If you want to use a project template you’ve not used before, create a dummy project with that template (which will be uploaded to the cloud). Give it a funny name, maybe
The template will be downloaded to your local app data
Windows: %APPDATA%\UnityHub\Templates
In that folder you find .tgz archives for each template. Select the one you need and pull the contents of package/ProjectData~ out.
Place it into a new folder with your desired project name.
In Unity Hub, click “Add” next to the “+New project” button and add a project from disk
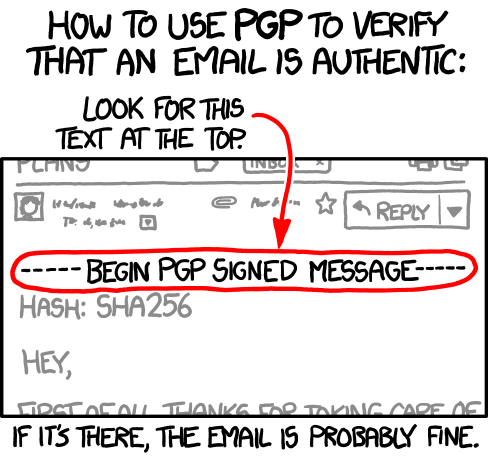
Email encryption forever is a pain point in the IT ecosystem. PGP is a great system but hasn’t been widely adopted. This is how I personally have used PGP in the past, for the <10 PGP emails I have received over my entire lifetime:
https://xkcd.com/1181 (Yes, I know the joke is more about sender verification and less about encryption itself)
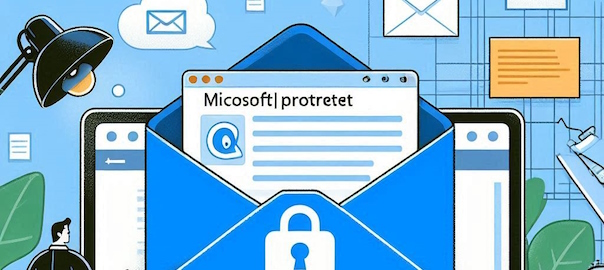
Microsoft has rolled out their own solution to the problem: Outlook Protected Messages. A proprietary system on top of an open, wide-spread standard – I don’t really like that but hey, it is better than nothing! If an Outlook user sends you such a protected email to a non-Outlook and non-GMail address, you will receive an email “Alice has sent you a message that was protected with Microsoft Office 365” and a link to click. You’ll be redirected to a page where you can sign in and receive a single-use code sent to your email address.
But here is the catch: This sign in just doesn’t work! The email I received these messages is not connected to a Microsoft account. So I could not login to request the single-use code. I then tried it with an email which was connected to a Microsoft account – turns out, this also doesn’t work! Even if the protected email was sent to this Microsoft account.
Somehow, the solution to this is to trick Microsoft into your browser being a mobile browser. Then, you are not asked for any sign in but can directly request the single-use code. This is how you do it, using the Browser’s developer tools:
Copy the link from the protected message
Open a new empty browser tab.
Right-click → Inspect
Click the “device icon”
On Firefox, it is on the right side of the bar
On Chrome, it is on the left side of the bar
Your browser now acts as a mobile browser.
Enter the link into the address bar
Request the single-use code to be sent to your email
Or: How to install any app on the Quest 3 without giving Meta your phone number.
With the long anticipated Apple Vision Pro become available at February 2nd 2024 (unfortunately only in the US), we’ll finally see Apple’s take on a consumer-ready headset for mixed reality – er … I meant to say spatial computing. Seamless video see-through and hand tracking – what a technological marvel.
As of now, the closest alternative to the Vision Pro, those unwilling to spend $3500 or located outside the US, seems to be the Meta Quest 3. And this only at a fraction of the price, at $500. But unlike Apple, Meta is less known for privacy-aware products. After all, it is their core business model to not be.
This post explains how to increase your privacy on the Quest 3, in four easy steps.
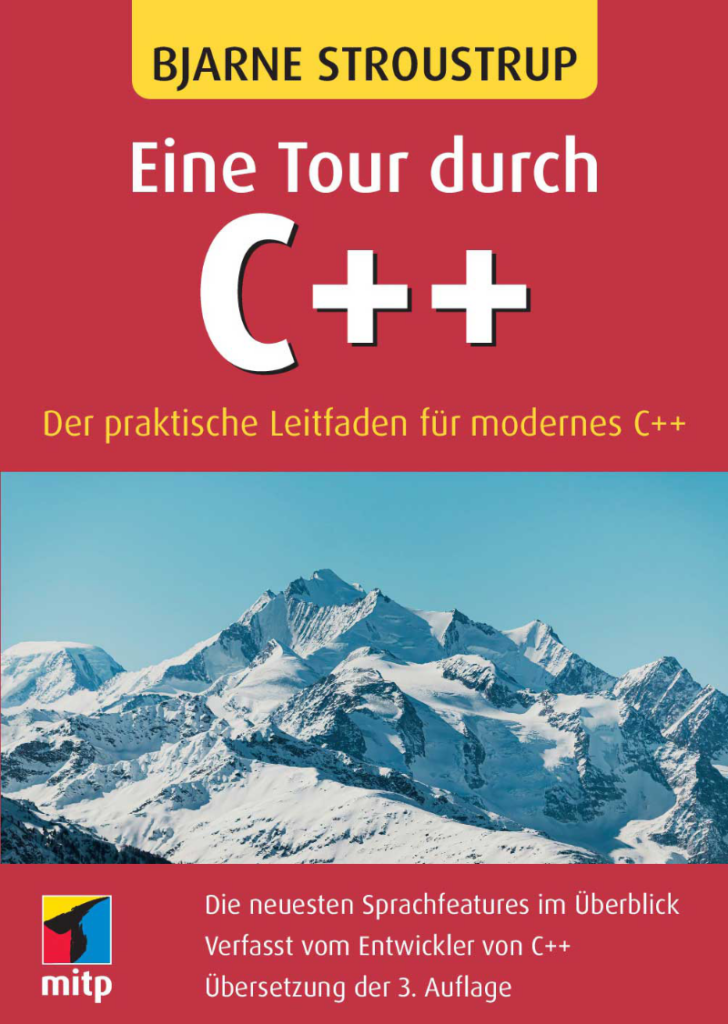
English tl;dr: I helped with the German translation of Bjarne Stroustrup’s “A Tour of C++”. As it is about a German book, this post is in German as well
Nachdem Sie mit dem Buch “C++ Schnelleinstieg” einen praktikablen Einstieg in diese Sprache gewagt haben, können Sie als nächstes Ihr Wissen mit “Eine Tour durch C++” vervollständigen. Bei der Übersetzung dieses Buches vom Englischen ins Deutsche habe ich als Fachkorrektor mitgewirkt.
Dieses Buch deckt zahlreiche Features ab, die mit C++20 neu eingeführt wurden, darunter Module, Konzepte, Koroutinen und Bereiche. Selbst einige schon jetzt verfügbare Komponenten, die nicht vor C++23 in den Standard integriert werden sollen, werden vorgestellt.
Bjarne Stroustrup hat C++ entwickelt und die erste Implementierung geschrieben. Derzeit ist er Professor an der Columbia University und hat zuvor bei AT&T Bell Labs an der Texas A&M University sowie bei Morgan Stanley gearbeitet.