https://www.linkedin.com/posts/philipphasper_vuforia-ai-ar-activity-7272260967709773826-fSgI
Tag Archives: Software Development
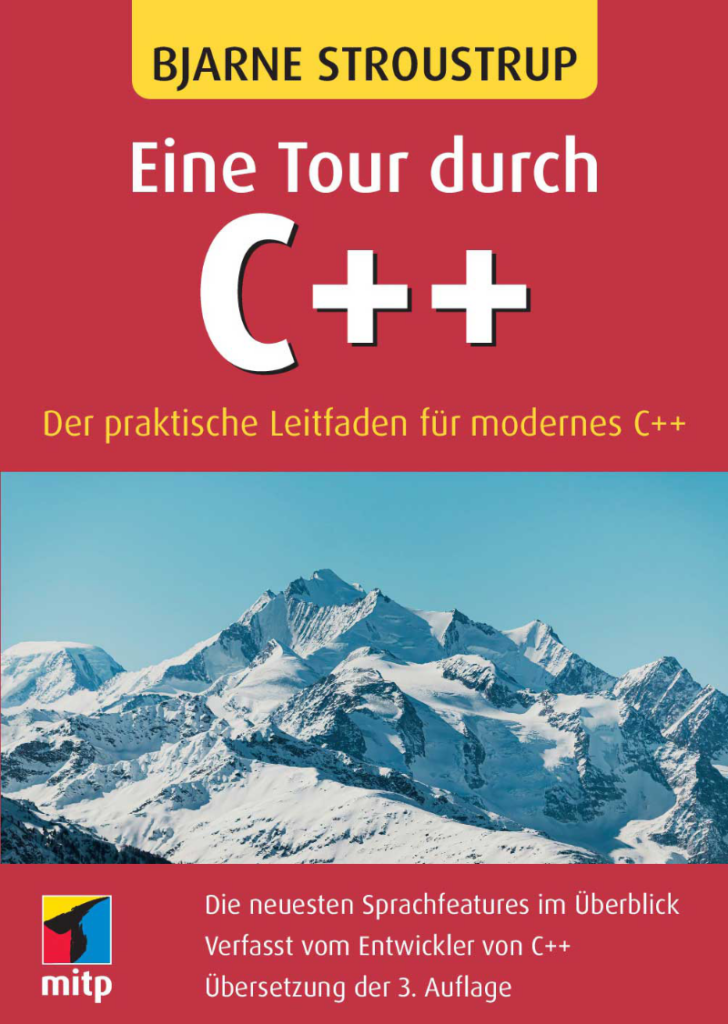
Eine Tour durch C++
English tl;dr: I helped with the German translation of Bjarne Stroustrup’s “A Tour of C++”. As it is about a German book, this post is in German as well
Nachdem Sie mit dem Buch “C++ Schnelleinstieg” einen praktikablen Einstieg in diese Sprache gewagt haben, können Sie als nächstes Ihr Wissen mit “Eine Tour durch C++” vervollständigen. Bei der Übersetzung dieses Buches vom Englischen ins Deutsche habe ich als Fachkorrektor mitgewirkt.
Dieses Buch deckt zahlreiche Features ab, die mit C++20 neu eingeführt wurden, darunter Module, Konzepte, Koroutinen und Bereiche. Selbst einige schon jetzt verfügbare Komponenten, die nicht vor C++23 in den Standard integriert werden sollen, werden vorgestellt.
Beim Verlag kaufen: Eine Tour durch C++
Über den Autor:
Bjarne Stroustrup hat C++ entwickelt und die erste Implementierung geschrieben. Derzeit ist er Professor an der Columbia University und hat zuvor bei AT&T Bell Labs an der Texas A&M University sowie bei Morgan Stanley gearbeitet.
Step Check Open Beta start
Wow, what a journey 🚀😎 . We are so proud to finally publicly share one of the things we have worked on since ioxp joined Vuforia: The new Vuforia Instruct feature Step Check™, starts its Public Beta now!
Based on the best-in-class Vuforia technology and developed together with many of the brightest people I know:
✴️Assisted quality assurance using #augmentedreality
✴️Integrated AI training
✴️Authoring from CAD
Next steps: learn from the beta feedback, improve and deliver!
Thank you, Vuforia, for how all of you welcomed us and for how we made things possible – together!
#ar #computervision #mixedreality #innovation #service #qualityassurance #acquisition
Update: Special video for the third Sunday of Advent 😉
C++ Weihnachtsspecial
English summary: This is a holiday special for my German C++ beginners book, hence this post is in German.
Dieser Blogpost erweitert Ihr Wissen aus dem Buch C++ Schnelleinstieg: Programmieren lernen in 14 Tagen. Nach dem Kapitel 9 (Fortgeschrittene Konzepte) haben Sie alle nötigen Grundlagen, die Sie als Voraussetzung für das Special benötigen:
- Grundlagen der Objektorientierung
- Bibliotheken mittels vcpkg einbinden
- GUI-Programmierung mit Nana
- Callbacks und Lambdas
- Fehler werfen
In diesem Projekt soll ein Weihnachtsbaum programmiert werden, bei dem Sie die Kerzen per Mausklick anzünden können. So sieht das ganze aus, wenn es fertig ist:
Das Codebeispiel beginnt in der main
-Funktion des Programms und fügt nach und nach zusätzliche Komponenten oberhalb ein – daher beginnt die Zeilennummerierung so wie sie in der fertigen Datei sein wird (Downloadlink am Ende des Beitrags). Der Code wird durch Erklärungen unterbrochen, wie Sie an den fortlaufenden Zeilennummern erkennen können.
int main()
{
nana::paint::image tree("tree.png");
if (tree.empty())
{
/* Sie müssen die drei Bilder (tree.png, candleOn.png, candleOff.png) in den
Build-Ordner kopieren. Sie finden diesen, indem Sie in Visual Studio im
Projektmappen-Explorer einen Rechtsklick auf das Projekt durchführen und
"Ordner in Datei-Explorer öffnen" auswählen.
*/
throwException("Konnte das Baumbild nicht laden!");
}
Die Funktion throwException
wird später noch implementiert. Die für das Programm benötigten drei Bilder des Baums, der erloschenen und der angezündeten Kerze finden Sie zusammen mit der fertigen Codedatei am Ende dieses Beitrags. Nun geht es um die grundlegende Struktur: Das Fenster sowie die Kerzen.
// Ein Nana-Formular als Basis des Fensters anlegen
nana::form window(nana::API::make_center(tree.size().width, tree.size().height));
window.caption("C++ Weihnachtsspecial 2021");
// Jede Codezeile beim Anlegen der Liste entspricht einem Stockwerk des Baumes
std::vector<Candle> candles = { Candle(290, 200),
Candle(200, 300), Candle(300, 330), Candle(400, 315),
Candle(120, 430), Candle(250, 450), Candle(350, 450), Candle(480, 450),
Candle(70, 580), Candle(170, 620), Candle(290, 630), Candle(420, 625), Candle(540, 600) };
Die Kerzen werden als Objekte modelliert und mit x- und y-Koordinaten angelegt. Die Klassendefinition folgt gleich, nachdem der Rest der main
-Funktion besprochen wurde. Folgen Sie solange dem im Abschnitt 4.3 des Buches erläuterten Prinzip des “Wishful Programmings” und nehmen Sie einfach an, Sie hätten schon eine solche Klasse, die Ihnen alle Wünsche erfüllt. Nun sollen die Grafiken alle gezeichnet werden:
// Zeichnen des Baumes und der Kerzen
nana::drawing drawing(window);
drawing.draw([&](nana::paint::graphics& graphics)
{
tree.paste(graphics, nana::point(0, 0));
for (Candle& candle : candles)
{
candle.draw(graphics);
}
graphics.string(nana::point(10, static_cast<int>(window.size().height) - 20),
"C++ Schnelleinstieg: Programmieren lernen in 14 Tagen. Philipp Hasper, 2021");
});
Das Zeichnen der weihnachtlichen Szenerie übernimmt die Nana-Klasse nana::drawing
innerhalb einer Lambdafunktion. Sie sehen hier zwei praktische Methoden in Aktion:
tree.paste()
kopiert das Bild des Baumes an eine bestimmte Stelle – hier an die Stelle (0,0) was der linken oberen Ecke entspricht. Hierfür muss auch noch dasgraphics
-Object übergeben werden, welches aus dem Parameter der Lambdafunktion kommt.graphics.string()
schreibt einen Text an eine bestimmte Stelle. Hier soll es in die linke untere Ecke, daher muss für die y-Koordinate von der Höhe des Fensters genug Platz abgezogen werden, sodass der Text noch hinpasst.
Zum Schluss fehlen noch die Klickereignisse. Da die Kerzen als Grafiken gezeichnet wurden, haben sie kein automatisches Klick-Event wie zum Beispiel eine Schaltfläche. Daher muss jeder Klick ins Fenster abgefangen und darauf überprüft werden, ob seine Koordinaten innerhalb einer Kerze liegen:
// Jeden Klick überprüfen, ob er eine Kerze trifft
window.events().click([&](const nana::arg_click& event) {
if (event.mouse_args == nullptr)
{
// Event kann nicht verarbeitet werden
return;
}
for (Candle& candle : candles)
{
if (candle.isClicked(event.mouse_args->pos))
{
candle.toggle();
/* Hier könnte man mit einem return die Schleife verlassen.
Da sich aber bei falscher Platzierung die Kerzen überlagern
könnten, wird die Schleife noch zu Ende geführt.
*/
}
}
// Zeichnung wiederholen, sodass das Bild aktualisiert wird.
drawing.update();
});
// Fenster anzeigen und Nana starten
window.show();
nana::exec();
return 0;
}
Ob eine Kerze geklickt wurde, wird innerhalb der Candle-Klasse überprüft. Auch die Reaktion auf einen Klick ist in dieser Klasse implementiert. Fügen Sie daher diese Klasse oberhalb der main
-Funktion ein:
// Klasse zum Zeichnen einer Kerze in zwei Zuständen (angezündet, ausgeblasen)
class Candle {
private:
nana::paint::image candleOn;
nana::paint::image candleOff;
bool isOn = false;
nana::rectangle rectangle;
public:
Candle(int centerX, int centerY)
: candleOn("candleOn.png"),
candleOff("candleOff.png")
{
if (candleOn.empty() || candleOff.empty())
{
throwException("Konnte die Kerzenbilder nicht laden!");
}
if (candleOn.size() != candleOff.size())
{
throwException("Kerzenbilder haben nicht die gleiche Größe!");
}
/* Die an den Konstruktor übergebene x - und y - Koordinate sollen das Zentrum
der Kerze angeben, daher müssen Sie für das Ziel-Rechteck umgerechnet werden.
*/
nana::size size = candleOn.size();
rectangle = nana::rectangle(centerX - size.width/2,
centerY - size.height/2,
size.width,
size.height);
}
void draw(nana::paint::graphics& graphics)
{
if (isOn)
{
candleOn.paste(graphics, rectangle.position());
}
else
{
candleOff.paste(graphics, rectangle.position());
}
}
bool isClicked(const nana::point& point)
{
// Diese Methode testet, ob der Punkt innerhalb des Rechtecks liegt
return rectangle.is_hit(point);
}
void toggle()
{
isOn = !isOn;
}
};
Diese Klasse handhabt zwei verschiedene Bilder, die an einem Punkt zentriert angezeigt werden sollen. Abhängig vom Zustand (isOn
), wird das eine oder das andere Bild gezeichnet. Zur einfacheren Platzierung wird beim Erzeugen des Objektes das gewünschte Zentrum der Kerze angegeben, was dann innerhalb des Konstruktors in ein entsprechendes Rechteck umgerechnet werden muss.
Nun fehlt noch eine Hilfsfunktion, die eine Fehlermeldung auf der Konsole ausgibt und dann einen Fehler wirft. Fügen Sie diese am Anfang der Datei, nach den include-Befehlen ein:
// Funktion, einen Fehler auf der Konsole ausgibt und dann einen Fehler wirft
void throwException(const std::string& msg)
{
std::cout << msg << std::endl;
throw std::exception(msg.c_str());
}
Und das war auch schon das ganze Programm. Frohe Feiertage und einen guten Rutsch! Den vollständigen Code und die Bilder können Sie hier herunterladen:
Jekyll plugin to bundle zip archives
The website for my recently published C++ book, cpp.hasper.info (German), was made with the static site generator Jekyll. It contains additional information, such as the code of all projects inside the book, as well as the sample solution for the exercises at the end of each chapter.
The reason why I used a static site generator in the first place was that I had all the code files organized in a folder, equipped with a CMake file which made sure the projects compile and are statically analyzed (I used cppcheck and cpplint, albeit with a very reduced set of checks due to the nature of the code examples). In order to not destroy this automation by copy-pasting code into a CMS, the site had to be generated around the code files.
I also wanted to enable the download of all C++ files as zip archive on a per-chapter basis. Again – I did not want to manually create this archive, in case I had to change some code in the future. So I wrote a Jekyll plugin which bundles given files into a zip archive which then can be placed behind a download link.
How it is used:
Filenames as multiple parameters:
{% zip archiveToCreate.zip file1.txt file2.txt %}
Spaces in filenames:
{% zip archiveToCreate.zip file1.txt folder/file2.txt 'file with spaces.txt' %}
A variable to contain a list of files is also possible:
{% zip ziparchiveToCreate.zip {{ chapter_code_files }} %}
The plugin code:
The plugin can be found here: https://github.com/PhilLab/jekyll-zip-bundler
# frozen_string_literal: true
# Copyright 2021 by Philipp Hasper
# MIT License
# https://github.com/PhilLab/jekyll-zip-bundler
require 'jekyll'
require 'zip'
# ~ gem 'rubyzip', '~>2.3.0'
module Jekyll
# Valid syntax:
# {% zip archiveToCreate.zip file1.txt file2.txt %}
# {% zip archiveToCreate.zip file1.txt folder/file2.txt 'file with spaces.txt' %}
# {% zip {{ variableName }} file1.txt 'folder/file with spaces.txt' {{ otherVariableName }} %}
# {% zip {{ variableName }} {{ VariableContainingAList }} %}
class ZipBundlerTag < Liquid::Tag
VARIABLE_SYNTAX = /[^{]*(\{\{\s*[\w\-.]+\s*(\|.*)?\}\}[^\s{}]*)/mx.freeze
CACHE_FOLDER = '.jekyll-cache/zip_bundler/'
def initialize(tag_name, markup, tokens)
super
# Split by spaces but only if the text following contains an even number of '
# Based on https://stackoverflow.com/a/11566264
# Extended to also not split between the curly brackets of Liquid
# In addition, make sure the strings are stripped and not empty
@files = markup.strip.split(/\s(?=(?:[^'}]|'[^']*'|{{[^}]*}})*$)/)
.map(&:strip)
.reject(&:empty?)
end
def render(context)
# First file is the target zip archive path
target, files = resolve_parameters(context)
abort 'zip tag must be called with at least two files' if files.empty?
zipfile_path = CACHE_FOLDER + target
FileUtils.makedirs(File.dirname(zipfile_path))
# Create the archive. Delete file, if it already exists
File.delete(zipfile_path) if File.exist?(zipfile_path)
Zip::File.open(zipfile_path, Zip::File::CREATE) do |zipfile|
files.each do |file|
# Two arguments:
# - The name of the file as it will appear in the archive
# - The original file, including the path to find it
zipfile.add(File.basename(file), file)
end
end
puts "Created archive #{zipfile_path}"
# Add the archive to the site's static files
site = context.registers[:site]
site.static_files << Jekyll::StaticFile.new(site, "#{site.source}/#{CACHE_FOLDER}",
File.dirname(target),
File.basename(zipfile_path))
# No rendered output
''
end
def resolve_parameters(context)
# Resolve the given parameters to a file list
target, files = @files.map do |file|
next file unless file.match(VARIABLE_SYNTAX)
# This is a variable. Look it up.
context[file]
end
[target, files]
end
end
end
Liquid::Template.register_tag('zip', Jekyll::ZipBundlerTag)
C++ Schnelleinstieg
English summary: I have published a C++ beginners book. As it is in German, so is this post.
Auf 304 kompakten Seiten bekommen Sie einen fundierten Einstieg in die C++ Programmierung. Besonders hervorzuheben und für ein Einsteigerbuch ungewöhnlich ist die Einbindung von diversen Open-Source-Bibliotheken – professionell gemanaged mittels des Paketmanagers vcpkg. Im Rahmen des Buches erlernen Sie auch fortgeschrittene Fähigkeiten wie die Programmierung graphischer Oberflächen und das Arbeiten mit Web-APIs, wie der von Wikipedia. Das Buch legt wert auf einen verständlichen aber dennoch professionellen Programmierstil und gibt einen Ausblick über das Programmieren im professionellen Umfeld, sowie Anküpfungspunkte zum selbstständigen Erweitern der eigenen Kenntnisse.
Das Begleitmaterial sowie das Inhaltsverzeichnis und eine Leseprobe finden Sie auf https://cpp.hasper.info/
Beim Verlag kaufen: C++ Schnelleinstieg
Bei Amazon kaufen: C++ Schnelleinstieg
Natürlich freue ich mich sehr über eine Bewertung des Buches.
- Alle Grundlagen einfach erläutert
- Objektorientierte Programmierung
- Einsatz von Open-Source-Bibliotheken
- Grafische Benutzungsoberflächen (GUI)
- Internetanfragen und JSON-Parsing
- Zeiger und virtuelle Methoden
- Fehlersuche und Debugging
- Moderner Programmierstil
- Programmcode, Lösungen und Glossar zum Download
»Während viele andere C++-Lehrbücher ihr Heil in der Erklärung jedes noch so obskuren Details suchen, fokussiert sich Hasper auf alles Wichtige, das Entwicklerinnen und Entwickler bei der alltäglichen Arbeit brauchen. Haben sie bisher mit Sprachen wie JavaScript oder C# Erfahrung gesammelt, findet sich hier ein hilfreicher Wegweiser durch den Dschungel des modernen C++.«
(Heise Online, 09/2021)
»Didaktisch gut aufgebaut.«
(ekz Bibliotheksservice, 10/2021)
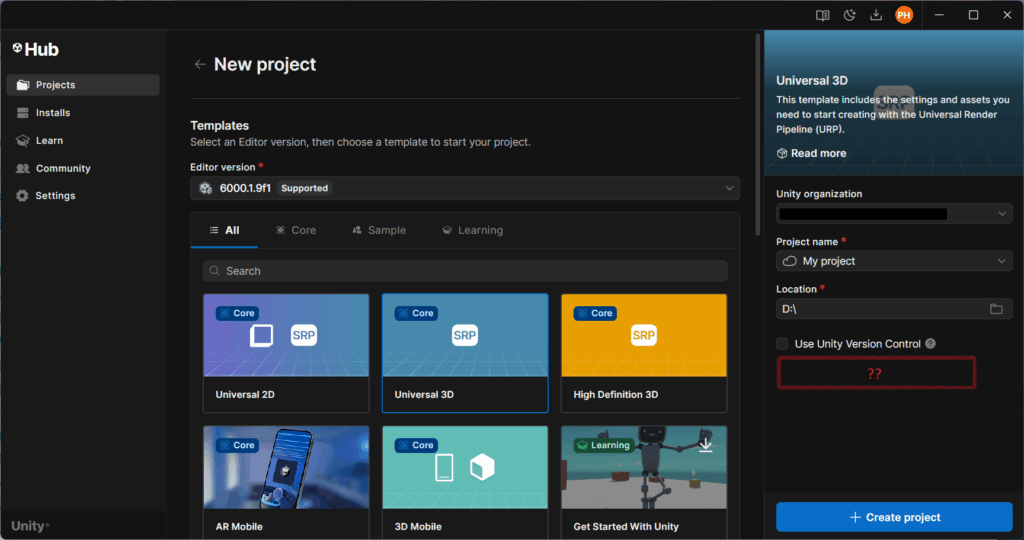
How to remove Unity Services from your project
I recently found myself in the situation that a Unity project which changed ownership, still linked to now non-existing Unity Services. It constantly gave me warning messages like:
Unable to access Unity services. Please log in or request membership to this project to use these services
These were only warnings, so nothing particularly dangerous, but still I wanted to get rid of them. As it took me multiple iterations to solve it and there are multiple unsolved or incomplete post about it, I wanted to share here how I finally managed to solve this problem:
- Navigate to the file <
Your project folder>/ProjectSettings/ProjectSettings.asset
and open it with a text editor - In the section
cloudServicesEnabled
, set all to 0 - Set the
cloudProjectId
empty (i.e. a space after the colon)
Especially the space part took me a while to figure it out. The respective sections of the Unity project’s settings file now look similar to this:
...
vrEditorSettings:
daydream:
daydreamIconForeground: {fileID: 0}
daydreamIconBackground: {fileID: 0}
cloudServicesEnabled:
UNet: 0
luminIcon:
m_Name:
m_ModelFolderPath:
m_PortalFolderPath:
luminCert:
m_CertPath:
m_SignPackage: 1
luminIsChannelApp: 0
luminVersion:
m_VersionCode: 1
m_VersionName:
apiCompatibilityLevel: 6
cloudProjectId:
framebufferDepthMemorylessMode: 0
...
Having these modifications in the project settings made the warning disappear, as the unused cloud services are now properly removed from the project. However, given that Unity sometimes changes their framework and configurations, this might get out-dated some day in the near future. If this doesn’t work anymore when you are trying it, please drop me a message, so I can retry and update the article. But so far, the warning has not popped up again in any of my Unity projects.
How we organize a small development team with minimal overhead in Gitlab
At ioxp we develop a novel way of sharing knowledge using Augmented Reality, AI and Computer Vision to change the way how industries operate. Our ecosystem consists of many different tools and technologies – the AI backend, Hololens apps , Android apps, a web-based editor and cloud services – so we are very dependent on an efficient way to organize our developers and their different, often overlapping sub-teams.
And after all we are a startup and engineers by heart – we have to keep the balance between a thorough designed process and the creative freedom needed to explore and create new things.
This post will concentrate on how we facilitate developer communication and team work using features of the DevOps tool Gitlab, factoring out all other important stages like product management, planning or sprint planning. It is an excerpt from our internal Handbook (naturally hosted as Wiki in Gitlab) and describes the process I have designed and implemented together with my team.
The development process is primarily guided by issues and their three most important attributes: labels, assignees and related merge requests. It uses as little as 10 different issue labels and is divided into six stages:
Continue reading How we organize a small development team with minimal overhead in Gitlab
How we keep an eye on our internal infrastructure with Gitlab – automated!
At ioxp, Gitlab is our tool of choice to organize our development. We also use their Wiki tool for our employee handbook and this is where we also have a list of all our internal services to maintain an overview about what is deployed, why and where. It looks like this:
To a) check that every service listed there is reachable and thus b) checking that the list is up-to-date (at least in one direction), we added a special Gitlab CI job which curl’s them all. This is its definition inside our main project’s .gitlab-ci.yml:
The script
Internal IT Check: only: variables: - $CI_CUSTOM_ITCHECK needs: [] variables: GIT_STRATEGY: none WIKI_PAGE: IT-Address-List.md before_script: - apk add --update --no-cache git curl - git --version - git clone https://gitlab-ci-token:${CI_JOB_TOKEN}@${CI_SERVER_HOST}/wiki/wiki.wiki.git script: # Scrape the URLs from the IT wiki page - cd wiki.wiki - | urls="$(cat $WIKI_PAGE | grep -Ev '~~.+~~' | grep -Eo '(http|https)://([-a-zA-Z0-9@:%_+.~#?&/=]+)' | sort -u)" if [ -z "$urls" ]; then echo "No URLs found in Wiki"; exit 1; fi - echo "Testing URLs from the Wiki:" &amp;&amp; echo "$urls" # Call each URL and see if it is available. set +e is needed to not exit on subshell errors. set -e is to revert to old behavior. # Special case: As one of our services does not like curls, we have to set a user agent - set +e - failures="" - for i in $urls ; do result="$(curl -k -sSf -H 'User-Agent:Mozilla' $i 2>&amp;1 | cut -d$'\n' -f 1)"; if [ $? -ne 0 ]; then failures="$failures\n$i - $result"; fi; done - set -e - if [ -z "$failures" ] ; then exit 0; fi # Errors happened - | errorText="ERROR: The following services listed in the Wiki are unreachable. Either they are down or the wiki page $WIKI_PAGE is out-dated:" echo -e "$errorText\033[0;31m$failures\033[0m" curl -X POST -H "Content-Type: application/json" --data "{ 'pretext': '${CI_JOB_NAME} failed: ${CI_JOB_URL}', 'text': '$errorText$failures', 'color': 'danger' }" ${CI_CUSTOM_SLACK_WEBHOOK_IT} 2>&amp;1 exit 1
Script Breakup
- Gitlab wikis are a git repository under the hood. You can clone them via <projectUrl>.wiki.git (The URL can also be retrieved by clicking on “Clone repository” at the upper right on the wiki main page
- The URLs are extracted by grepping the respective markdown page for http/https links:
grep -Eo '(http|https)://([-a-zA-Z0-9@:%_+.~#?&/=]+)'
- To ignore deprecated links (strikethrough in the wiki), we exclude them before with
grep -Ev '~~.+~~'
and to filter out duplicates we usesort -u
afterwards - Each found URL is then called via curl:
-k
disables the TLS certificate verification if you use self-signed certificates and haven’t installed your own root CA.-H 'User-Agent:Mozilla'
was needed because one of our services didn’t like to be curl’ed by a non-browser so we dress up as one.
- With
set +e
we prevent that a subshell error (i.e. the curl) makes the Gitlab job exit with a failure prematurely as we want a list of all errors, not just the first one. - If any error is found, a post containing the list of unavailable services is sent to our IT Slack channel using their webhooks.
Gitlab Preconditions
To run this job in a fixed interval, we set up a scheduled pipeline, running every day at two in the afternoon. The schedule has the variable CI_CUSTOM_ITCHECK
defined so the job’s only:
selector fires (see in the script above). All other jobs of our pipeline are either defined to not run under schedules or not when the variable is defined (using the except:
selector).
Gitlab pipelines only/except for WIP merge requests
At ioxp we automate our continuous integration using the awesome Gitlab project. However, their model of when testing jobs run on commits induced quite a heavy load on our testing servers. So we were very delighted when pipelines for merge requests were introduced in Gitlab 11.6.
We then configured our testing to run with
only:merge_requests
However, our development process (more on that in a later post) recommends:
If a developer starts working on an issue, they have to
1. (if not already done) assign them
2. Create a branch starting with their two-letter initials, likeph/purposeOfTheBranch
,
3. Open a new WIP merge request mentioning the issue to mark that it is currently being worked on. As the Merge Request window even offers a small button to automatically append this prefix, the workflow is quite easy here.
4. Assign themselves to the merge request because they are currently responsible for it
We do this to have a nice overview about what is currently going on and to discuss about unfinished work. However, our only:merge_requests became useless now – as every implementation starts with a merge request, the pipelines are immediately started wasting CI time.
Luckily, variables expressions came to our rescue:
integrationtest:
stage: integrationtest
tags:
- withBackend
only:
- merge_requests
except:
variables:
- $CI_MERGE_REQUEST_TITLE =~ /^WIP:.*/
It is as easy as that. The expression filters the merge requests by their title and the job only runs when it does not start with the WIP prefix.
Update: Newer GitLab versions use the “Draft:” prefix instead of “WIP:” by default, so to support both notations, the script needs to make use of the OR operator like this:
stage: integrationtest tags: - withBackend only: - merge_requests except: variables: - $CI_MERGE_REQUEST_TITLE =~ /^WIP:.*/ || $CI_MERGE_REQUEST_TITLE =~ /^Draft:.*/