Using cv::putText is cumbersome and placing your text at the correct position with the correct size is hard. Here is a wrapper function dealing with all of this for you. The text is fitted inside the given image, even multiple lines are possible and everything is nicely centered.
void ioxp::putText(cv::Mat imgROI, const std::string &text, const int fontFace = cv::FONT_HERSHEY_PLAIN,
    const cv::Scalar color = cv::Scalar::all(255), const int thickness = 1, const int lineType = cv::LINE_8)
{
    /*
     * Split the given text into its lines
     */
    std::vector<std::string> textLines;
    std::istringstream f(text);
    std::string s;
    while (std::getline(f, s, '\n')) {
        textLines.push_back(s);
    }

    /*
     * Calculate the line sizes and overall bounding box
     */
    std::vector<cv::Size> textLineSizes;
    cv::Size boundingBox(0,0);
    int baseline = 0;
    for (std::string line : textLines) {
        cv::Size lineSize = cv::getTextSize(line, fontFace, 1, thickness, &baseline);
        baseline += 2 * thickness;
        lineSize.width += 2 * thickness;
        lineSize.height += baseline;
        textLineSizes.push_back(lineSize);
        boundingBox.width = std::max(boundingBox.width, lineSize.width);
        boundingBox.height += lineSize.height;
    }

    const double scale = std::min(imgROI.rows / static_cast<double>(boundingBox.height),
                                  imgROI.cols / static_cast<double>(boundingBox.width));
    boundingBox.width *= scale;
    boundingBox.height *= scale;
    baseline *= scale;
    for (size_t i = 0; i < textLineSizes.size(); i++) {
        textLineSizes.at(i).width *= scale;
        textLineSizes.at(i).height *= scale;
    }
    /*
     * Draw the text line-by-line
     */
    int y = (imgROI.rows - boundingBox.height + baseline) / 2;
    for (size_t i = 0; i < textLines.size(); i++) {
        y += textLineSizes.at(i).height;
        // center the text horizontally
        cv::Point textOrg((imgROI.cols - textLineSizes.at(i).width) / 2, y - baseline);
        cv::putText(imgROI, textLines.at(i), textOrg, fontFace, scale, color, thickness, lineType);
    }
}
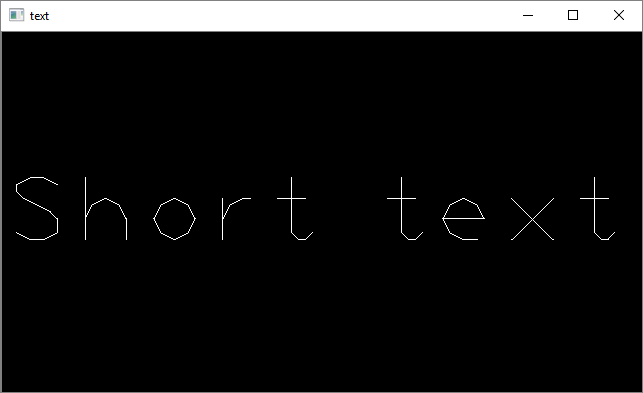
This is how you use it and how the results look like:
    cv::Mat outputImage(360, 640, CV_8UC3);
    outputImage.setTo(0);
    ioxp::putText(outputImage, "Short text");
    cv::imshow("text", outputImage);
    cv::waitKey(0);
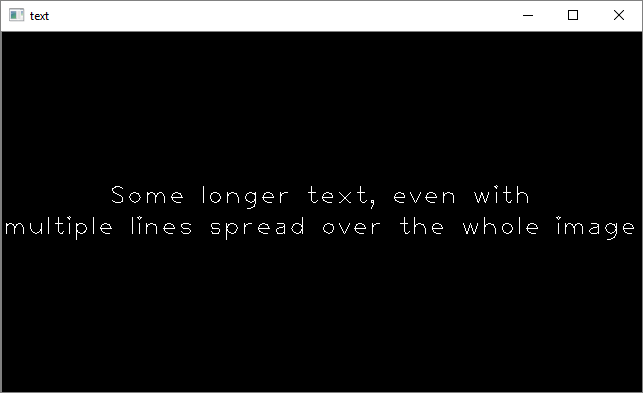
    cv::Mat outputImage(360, 640, CV_8UC3);
    outputImage.setTo(0);
    ioxp::putText(outputImage,
      "Some longer text, even with\nmultiple lines spread over the whole image");
    cv::imshow("text", outputImage);
    cv::waitKey(0);
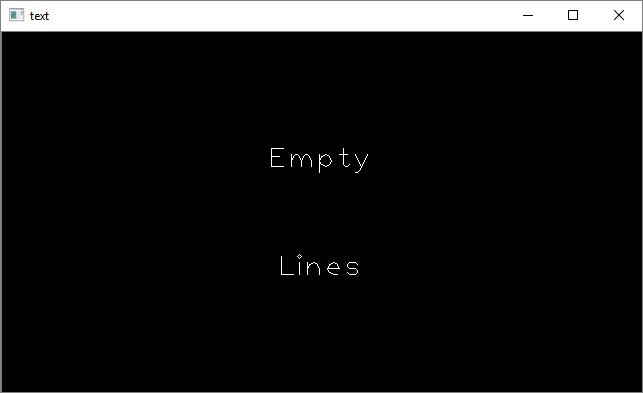
    cv::Mat outputImage(360, 640, CV_8UC3);
    outputImage.setTo(0);
    ioxp::putText(outputImage, "\n\n\nEmpty\n\n\nLines\n\n\n");
    cv::imshow("text", outputImage);
    cv::waitKey(0);
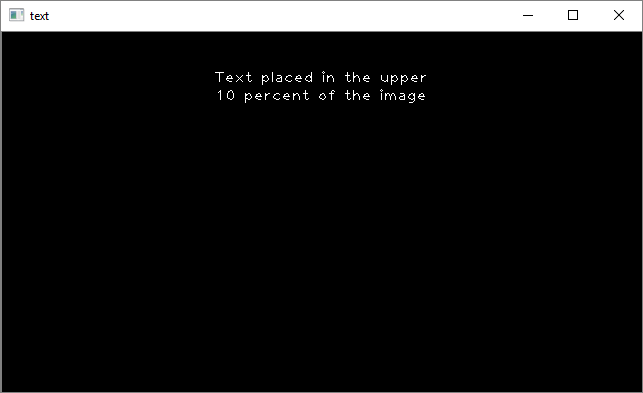
By using the Rectangle accessor you can define exactly, which part of the image the text should be placed in:
    cv::Mat outputImage(360, 640, CV_8UC3);
    outputImage.setTo(0);
    ioxp::putText(outputImage(cv::Rect(0, outputImage.rows / 10, outputImage.cols, outputImage.rows / 10)),
      "Text placed in the upper\n10 percent of the image");
    cv::imshow("text", outputImage);
    cv::waitKey(0);