Or: How to install any app on the Quest 3 without giving Meta your phone number.
With the long anticipated Apple Vision Pro become available at February 2nd 2024 (unfortunately only in the US), we’ll finally see Apple’s take on a consumer-ready headset for mixed reality – er … I meant to say spatial computing. Seamless video see-through and hand tracking – what a technological marvel.
As of now, the closest alternative to the Vision Pro, those unwilling to spend $3500 or located outside the US, seems to be the Meta Quest 3. And this only at a fraction of the price, at $500. But unlike Apple, Meta is less known for privacy-aware products. After all, it is their core business model to not be.
This post explains how to increase your privacy on the Quest 3, in four easy steps.
Some background first: The OS of the Quest 3 is Android-based, which allows you to install normal Android applications, through a process which is called “sideloading”. But there is a catch: To install Android apps via an .apk file, you are expected to upgrade your Meta account to a developer account, which requires a phone number – not exactly privacy-friendly. Luckily, there is a simple hack which just needs an USB cable and an Android smartphone, as we will see.
1. Download F-Droid
Instead of directly installing the desired Android app, it is worthwhile to install a 3rd-party store first, which provides easy installation, update and vetting of app packages. Here comes F-Droid, a catalogue of free and open source applications.
Download the apk to your Quest device, by opening https://f-droid.org in the Meta Quest Browser and clicking on the download button.
2. Install the apk file on the Quest 3
There is a problem now: The Quest Files app won’t do anything when clicking on the apk after the download. But here is the trick: We will convince the headset to bring up the pre-installed but hidden Android Files app and install it there.
- Connect your Quest headset via an USB cable to your smartphone (computer won’t do the trick, unfortunately)
- On the smartphone, click on the USB notification “Tap for other USB options”

- Reverse the roles by selecting “USB controlled by > This device”
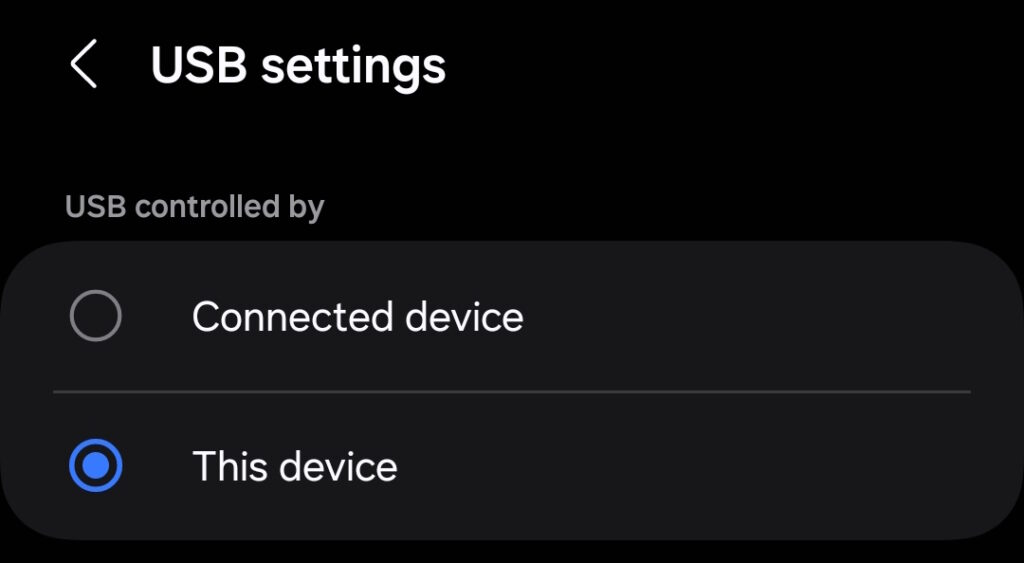
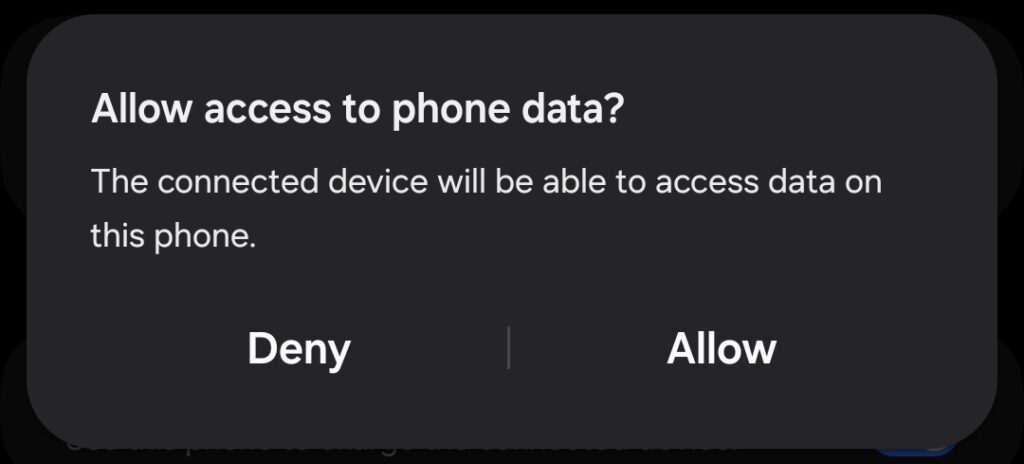
- This should open a dialog asking for permission. Click ‘Allow’
- If the notification does not appear immediately, put the Quest on to make sure it is not in standby
- Then switch the roles to “Connected device” and then back to “This device” again
- Now, the permission dialog should appear. Click ‘Allow’
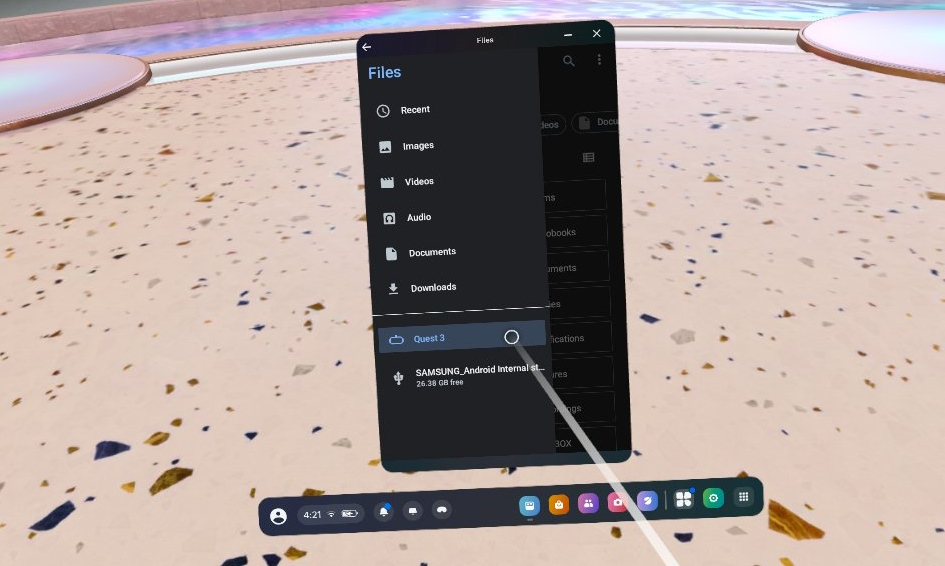
- Now on the Quest headset, a file browser should open. Use it to navigate to the download folder and click on the F-droid apk file
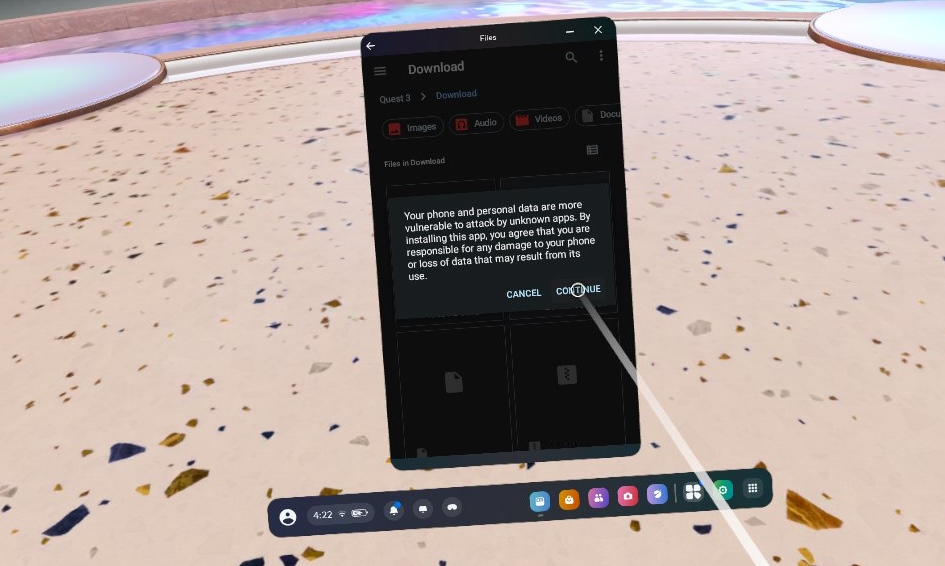
- Accept the installation from unknown sources and let it install
- You can disconnect the USB now, you won’t need it anymore
Voila, this is how you install an Android app on the Quest without giving your phone number to Meta. Also check out the bonus section at the bottom to install a file app for dealing with apk files in the future.
3. Install Rethink DNS
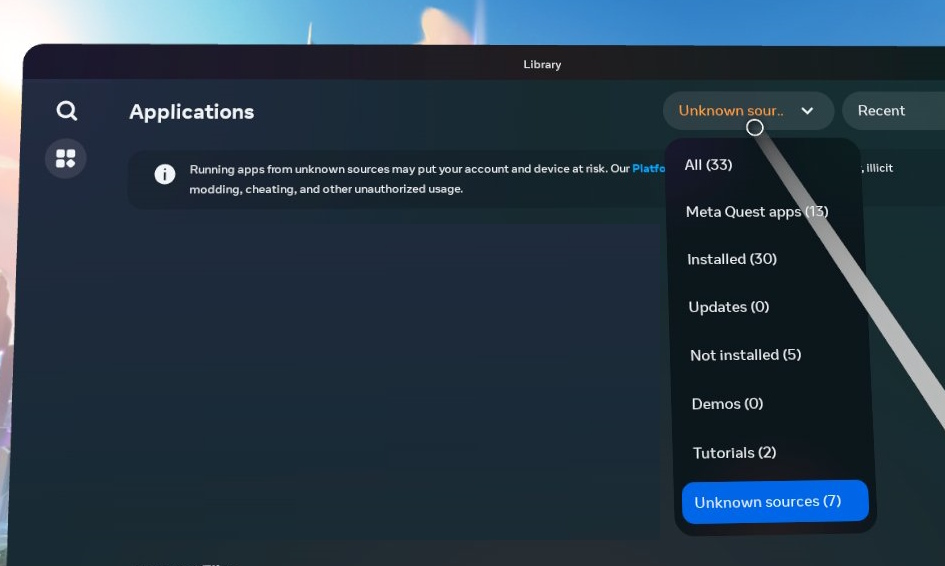
- Open the app library on the Quest headset and select ‘Unknown sources’ from the drop down on the right
- Click on F-Droid to open the app
- Type “Rethink” into F-Droids search bar, open the entry and click ‘Install’
4. Configure Rethink DNS
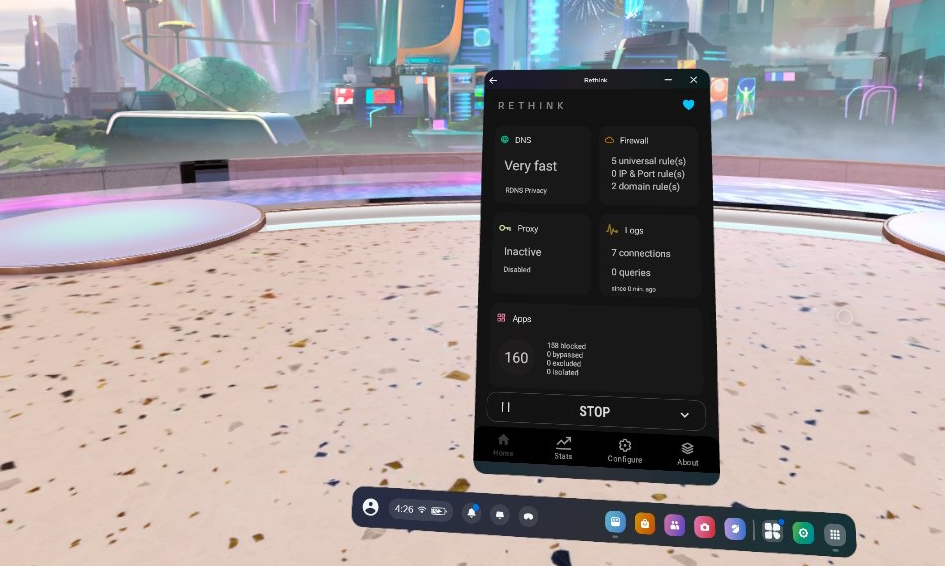
- Open the Rethink app similarly like you opened F-Droid: Via the ‘Unknown sources’ section.
- Click START to start the RethinkDNS resolver and Firewall.
- Grant the permission to set up a VPN – this is the clever trick how it does its work. The VPN runs locally, on-device, forcing all apps to go through it, thus the Rethink app can block requests at will.
- Make sure that the Auto-Start is activated (‘Configure’ → ‘Settings’)
The standard configuration now blocks all connections to known malicious sites, but our goal is privacy and thus blocking access to legitimate but nosy servers. There are two building blocks to this: The firewall and custom block-lists.
4.1 Set up the Firewall
- In Rethink’s main screen, click on the “Apps” section
- You can start with blocking all app’s access by clicking the grey WiFi symbol and the grey cellular icon at the top
- Now go through the list and selectively click the individual WiFi and cellular icon to allow network access again for specific apps
- Optional: You can also be more granular by putting an app into isolation mode, only allowing it to connect to specific domains:
- Click on the app name to open its Rethink settings
- Click the ‘Isolate’ icon
- Below, you can see the list of this app’s connections. Click on those domains you trust and allow them. If there are no connections listed, open the app first and then come back to this list. Rinse and repeat, if something does not work.
4.2 Optional: Custom block lists
- On Rethink’s main screen, click on the ‘DNS’ section at the top
- Scroll down to activate the in-app downloader, else the following won’t work
- Now scroll up to ‘On-device blocklists’ and click on it
- Click on the first menu entry and then on ‘Download block lists’
- After the download, you can activate the desired lists, e.g. the lists ‘Ads ( The Block List Project)‘ and ‘Tracking (The Block List Project)‘
Bonus: Additional install recommendations
Having installed F-Droid once, installing additional apps is now very easy. Here are some recommendations:
- Material Files – this offers you a full-grown file management app, much less limited than the officially available app. And it is capable to open and install any apk you might have downloaded outside of F-Droid, without the hassle of the USB connection trick above. This basically opens up your Quest to whatever you want to do with it.
- Fennec – This is actually the well-known Firefox browser, just all proprietary components like the Google Play services removed (more details).
And finally: If you like the service Rethink provides, consider a donation – currently, they spend +$1500 per month mostly out of their own pockets.
